GSAP Animations Documentation - Agentflow Webflow Template
The Datacenter Webflow template includes two custom GSAP animations that enhance your website's interactivity:
Marquee Scroll Animation - Creates a continuous scrolling strip that responds to user scroll direction and speed
Number Counter Animation - Animates numbers counting up when they enter the viewport
Progress Bar Animation - Animates a progress bar when it enters the viewport
Pixel Image Reveal Animation - Animates an image cover with a pixelated effect
This documentation will guide you through using these animations without needing to understand the code itself.
Required GSAP Plugins
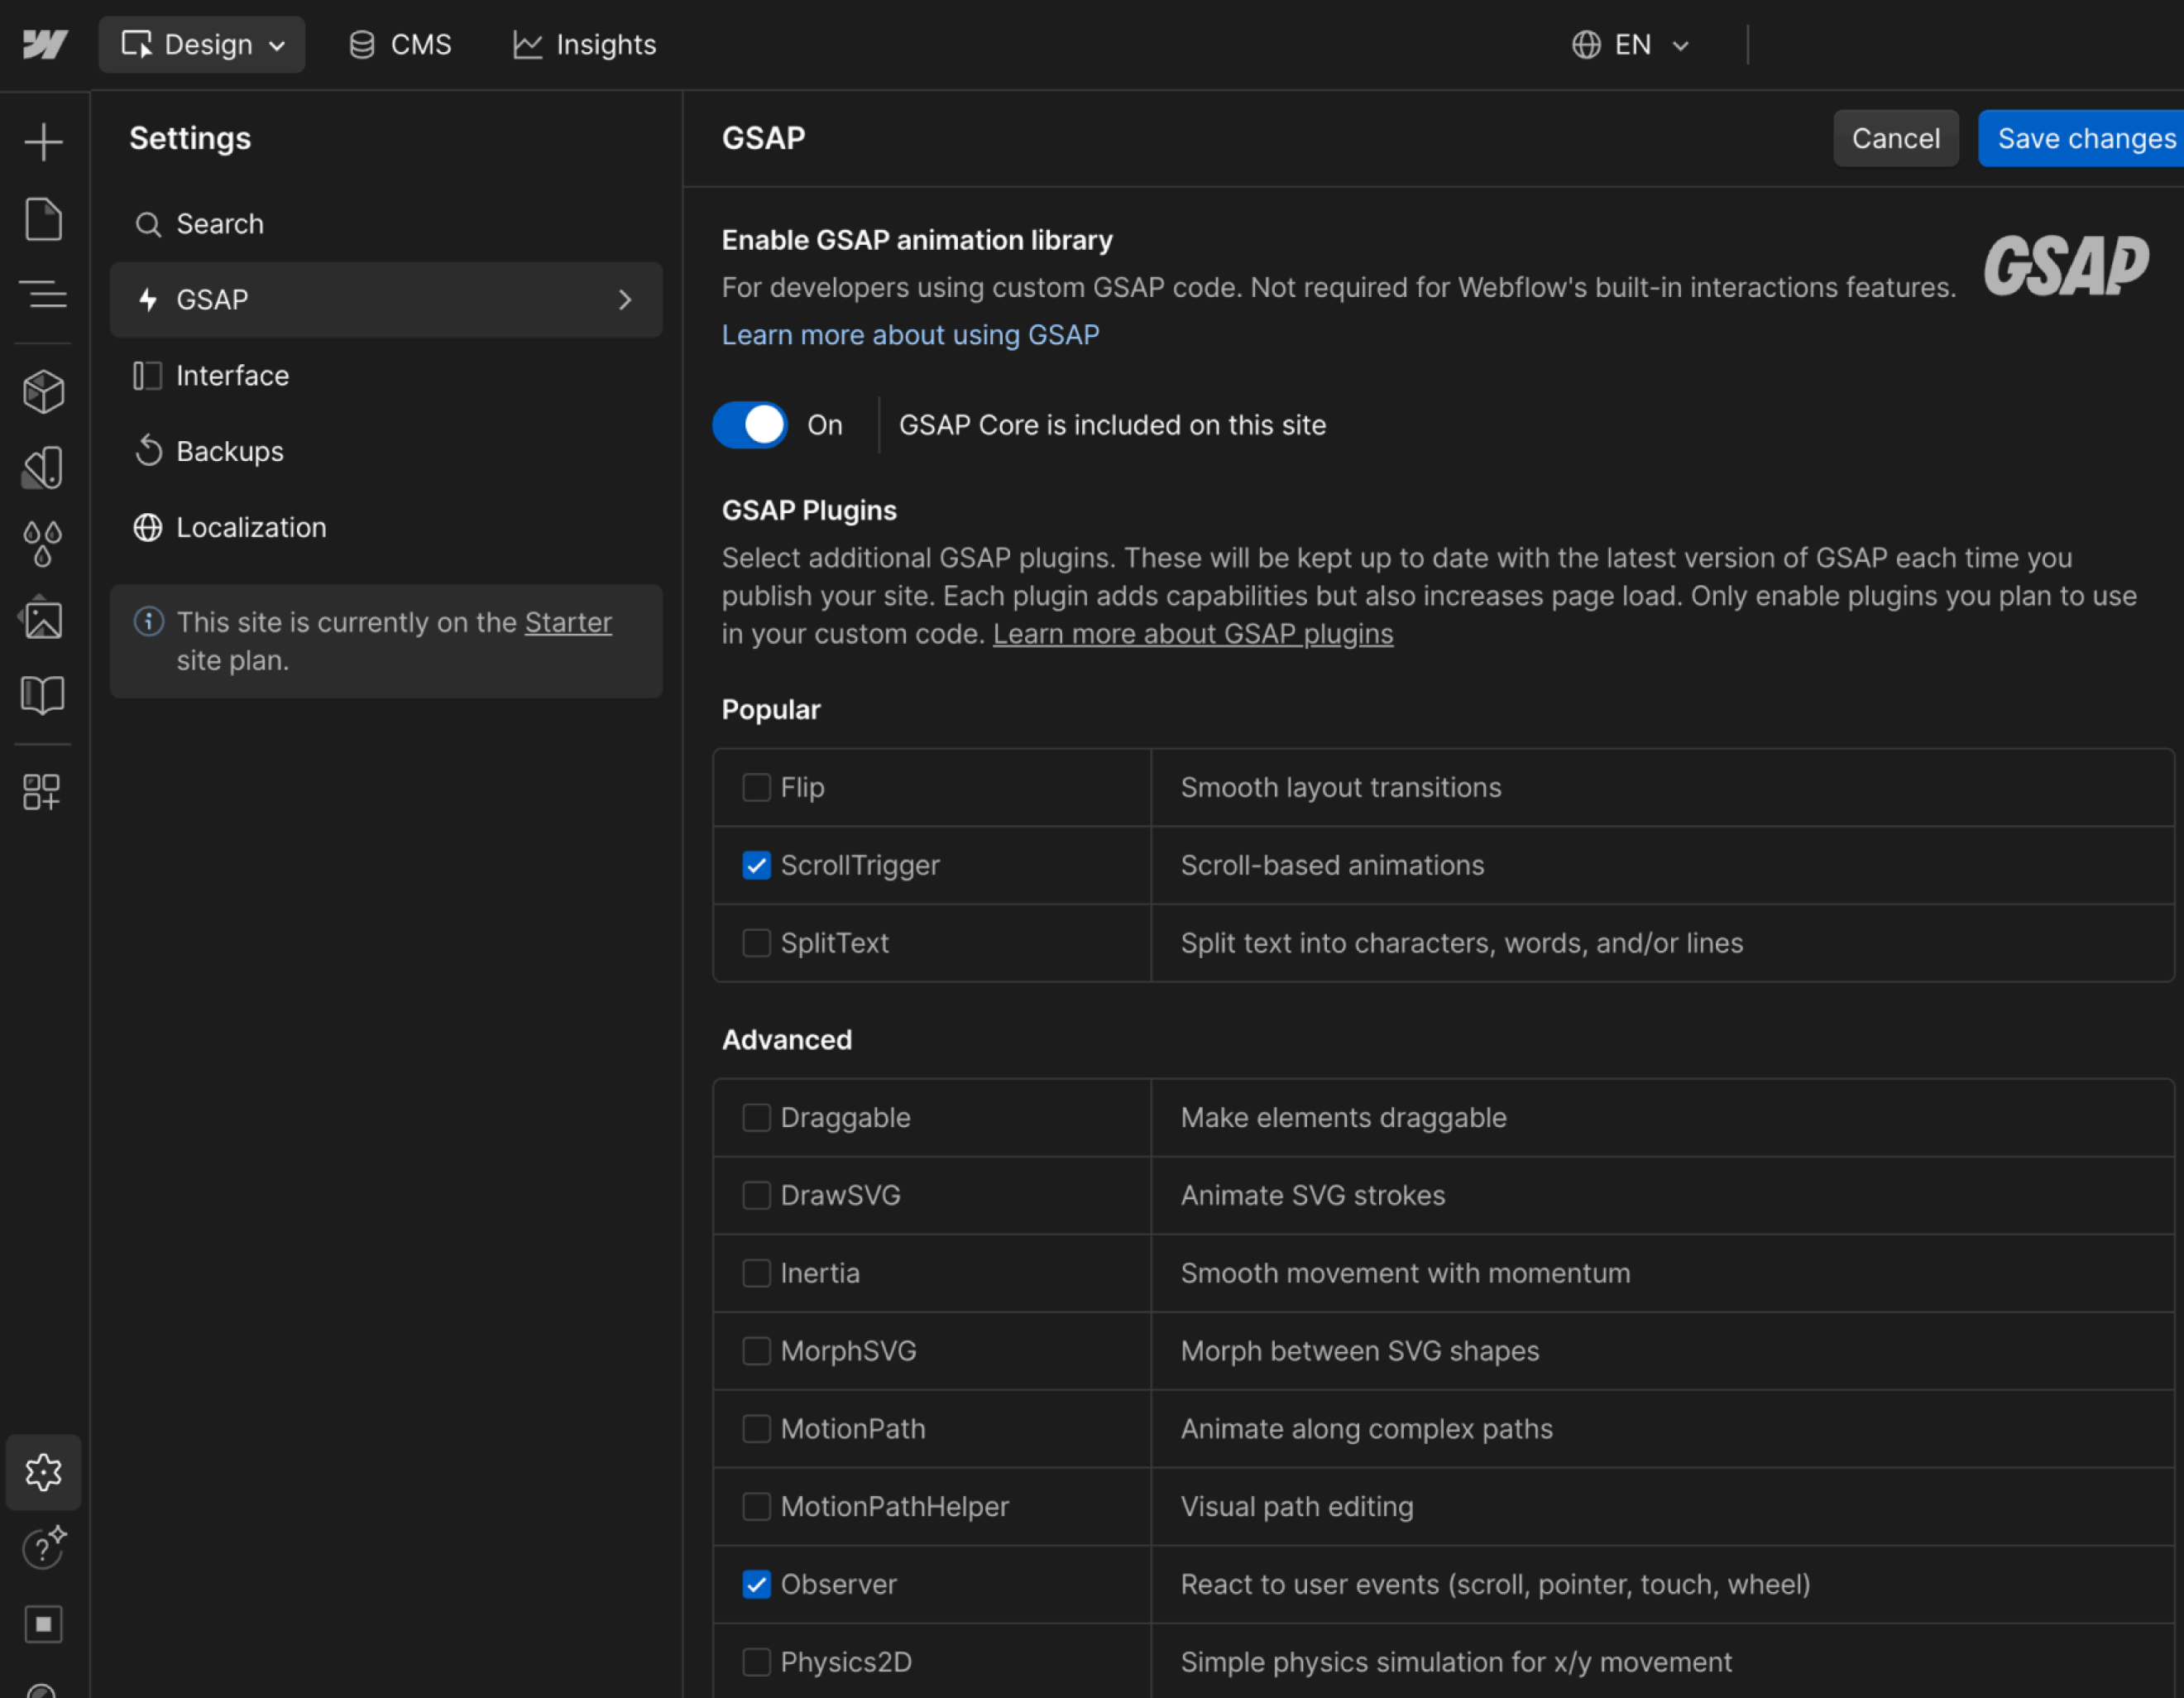
Before working with these animations, you need to enable the correct GSAP plugins in Webflow:
To enable GSAP plugins:
- Click on the Settings icon in the left sidebar
- Navigate to the GSAP section
- Toggle on Enable GSAP
- Select the required plugins:
For Marquee Scroll Animation:
- ScrollTrigger
- Observer
For Number Counter Animation:
- ScrollTrigger
For Progress Bar Animation:
- ScrollTrigger
For Pixel Image Reveal Animation:
- ScrollTrigger
Important Note: All of this has been previously set up in this template. Only enable the plugins you need. Adding unnecessary plugins can slow down your website by loading extra code.
Marquee Scroll Animation
What It Does
The marquee animation creates a continuously scrolling strip of logos (or any content) that:
- Scrolls automatically from right to left, or left to right
- Speeds up or slows down based on your scroll speed
- Reverses direction when you scroll up
- Returns to normal speed when you stop scrolling
How to Set It Up
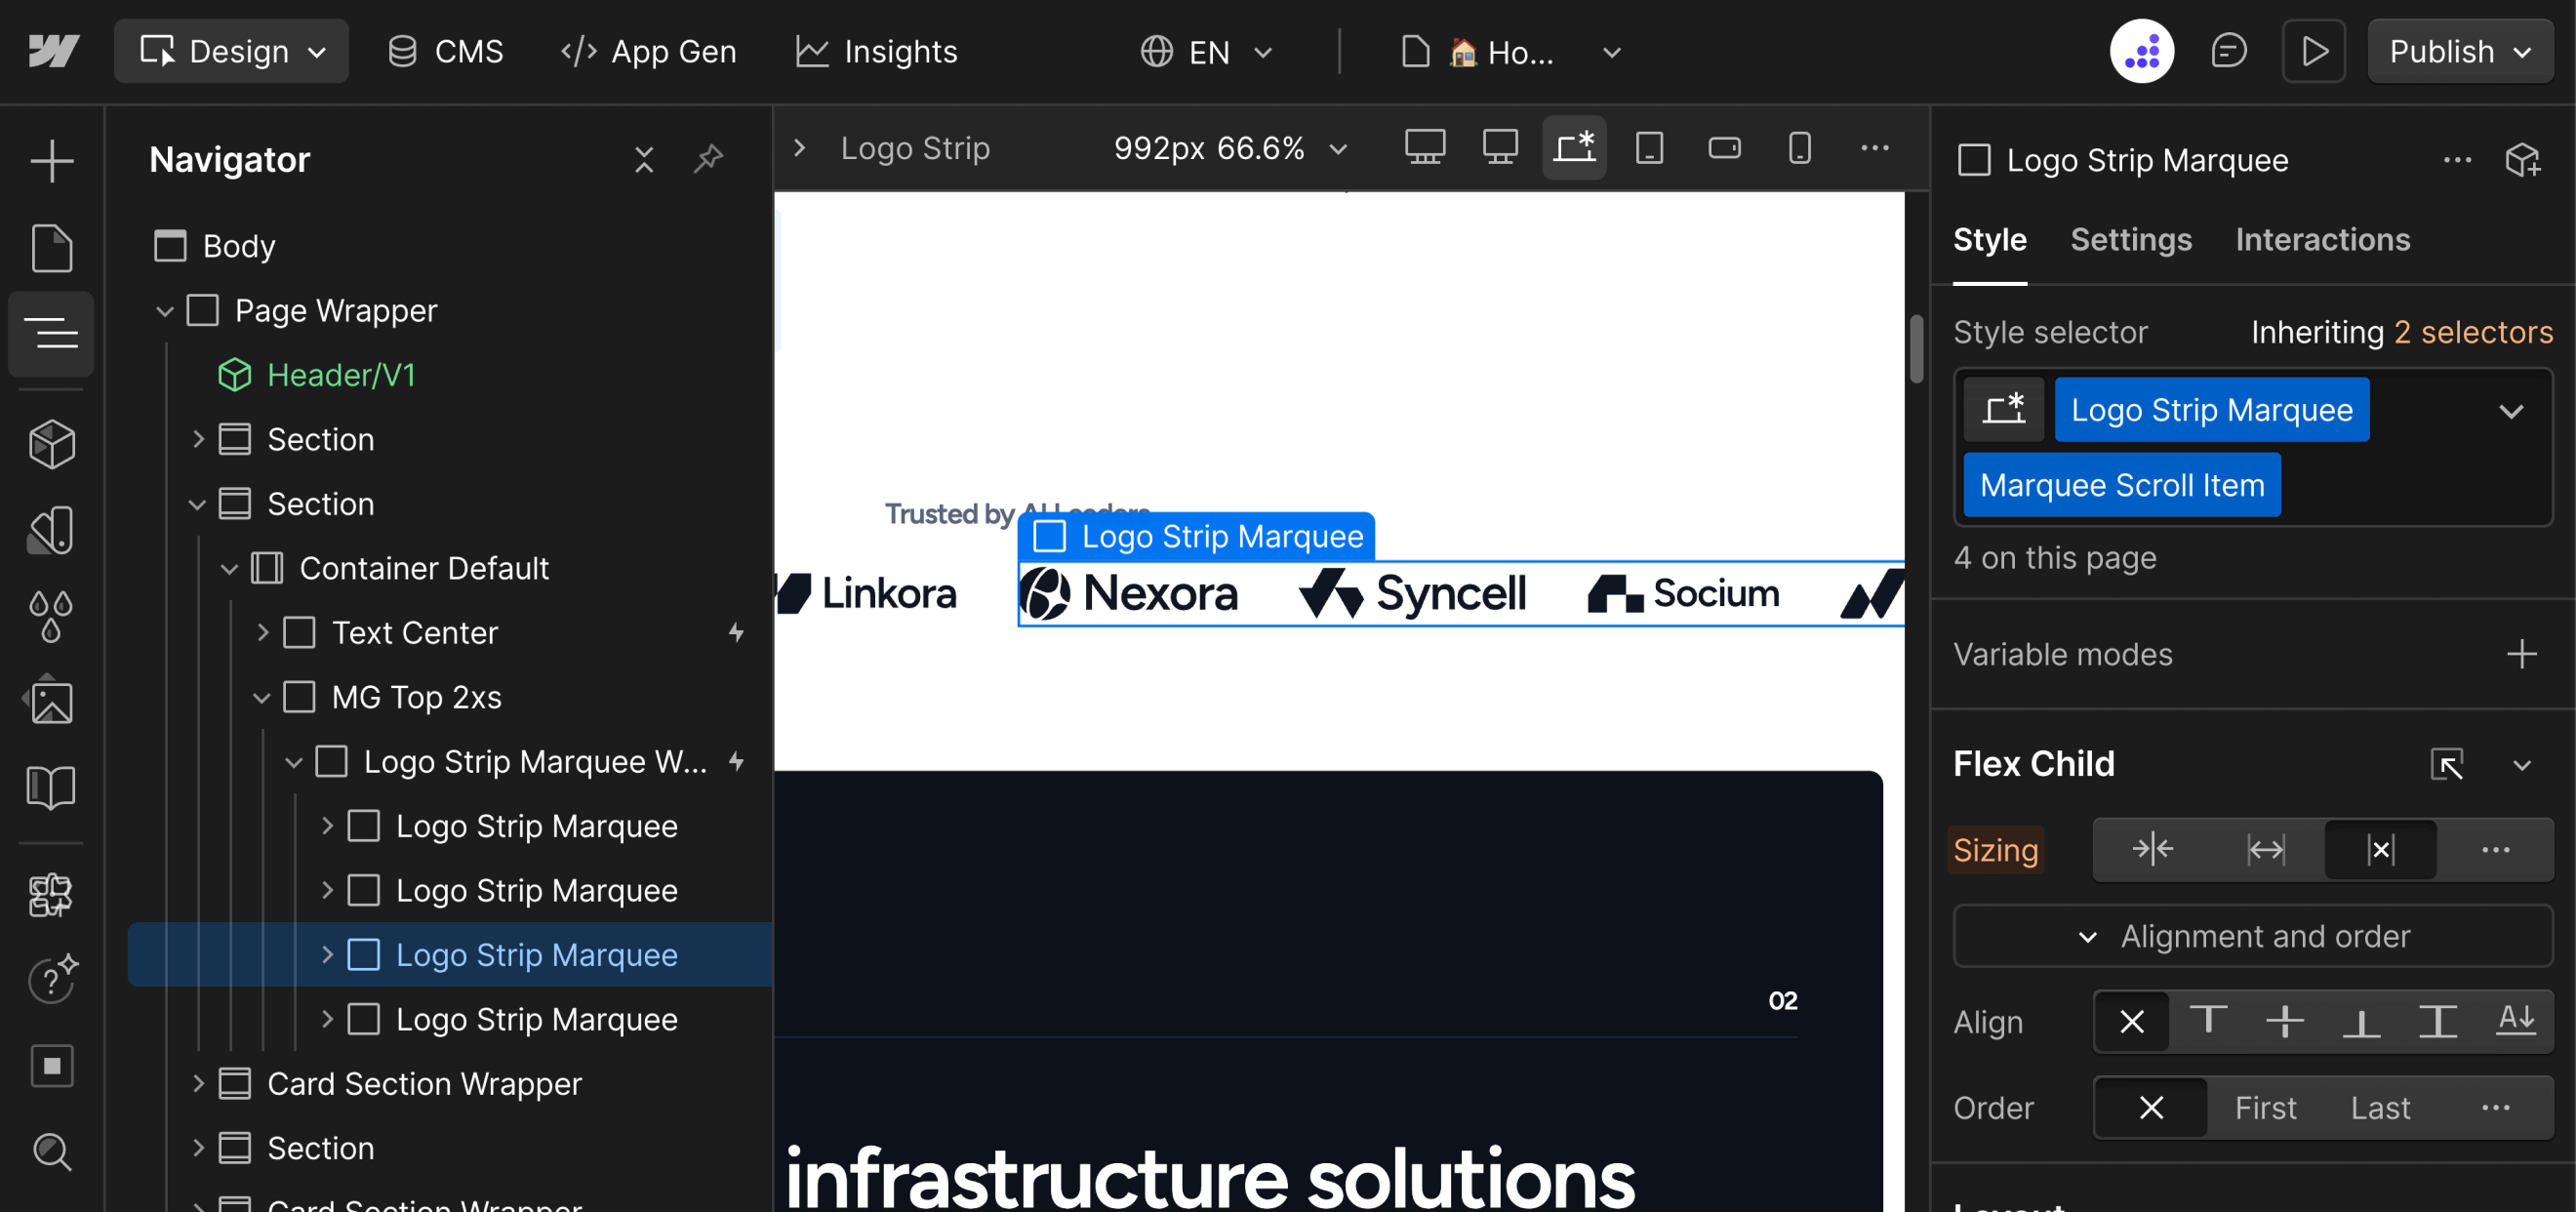
Required Structure:
Your marquee section needs these elements in this order:
- Multiple child elements (at least 4-5 copies) with the class marquee-scroll-item or marquee-scroll-item-inverse
- Each Marquee Scroll Item is identical and contains your logos or content
Step-by-Step Setup
- Select your marquee wrapper element
- Add your first strip element as a child
- Add the class Marquee Scroll Item to this element
- Duplicate this element 4-5 times (all siblings inside the wrapper)
- Make sure all duplicates have identical content
Why Multiple Copies?
Because the animation can move in either direction (left or right depending on scroll), you need multiple copies of your logo strip to ensure smooth looping. Without enough copies, you'll see empty space when the animation reverses direction.
Recommended: Use at least 4-5 identical copies of your Marquee Scroll Item.
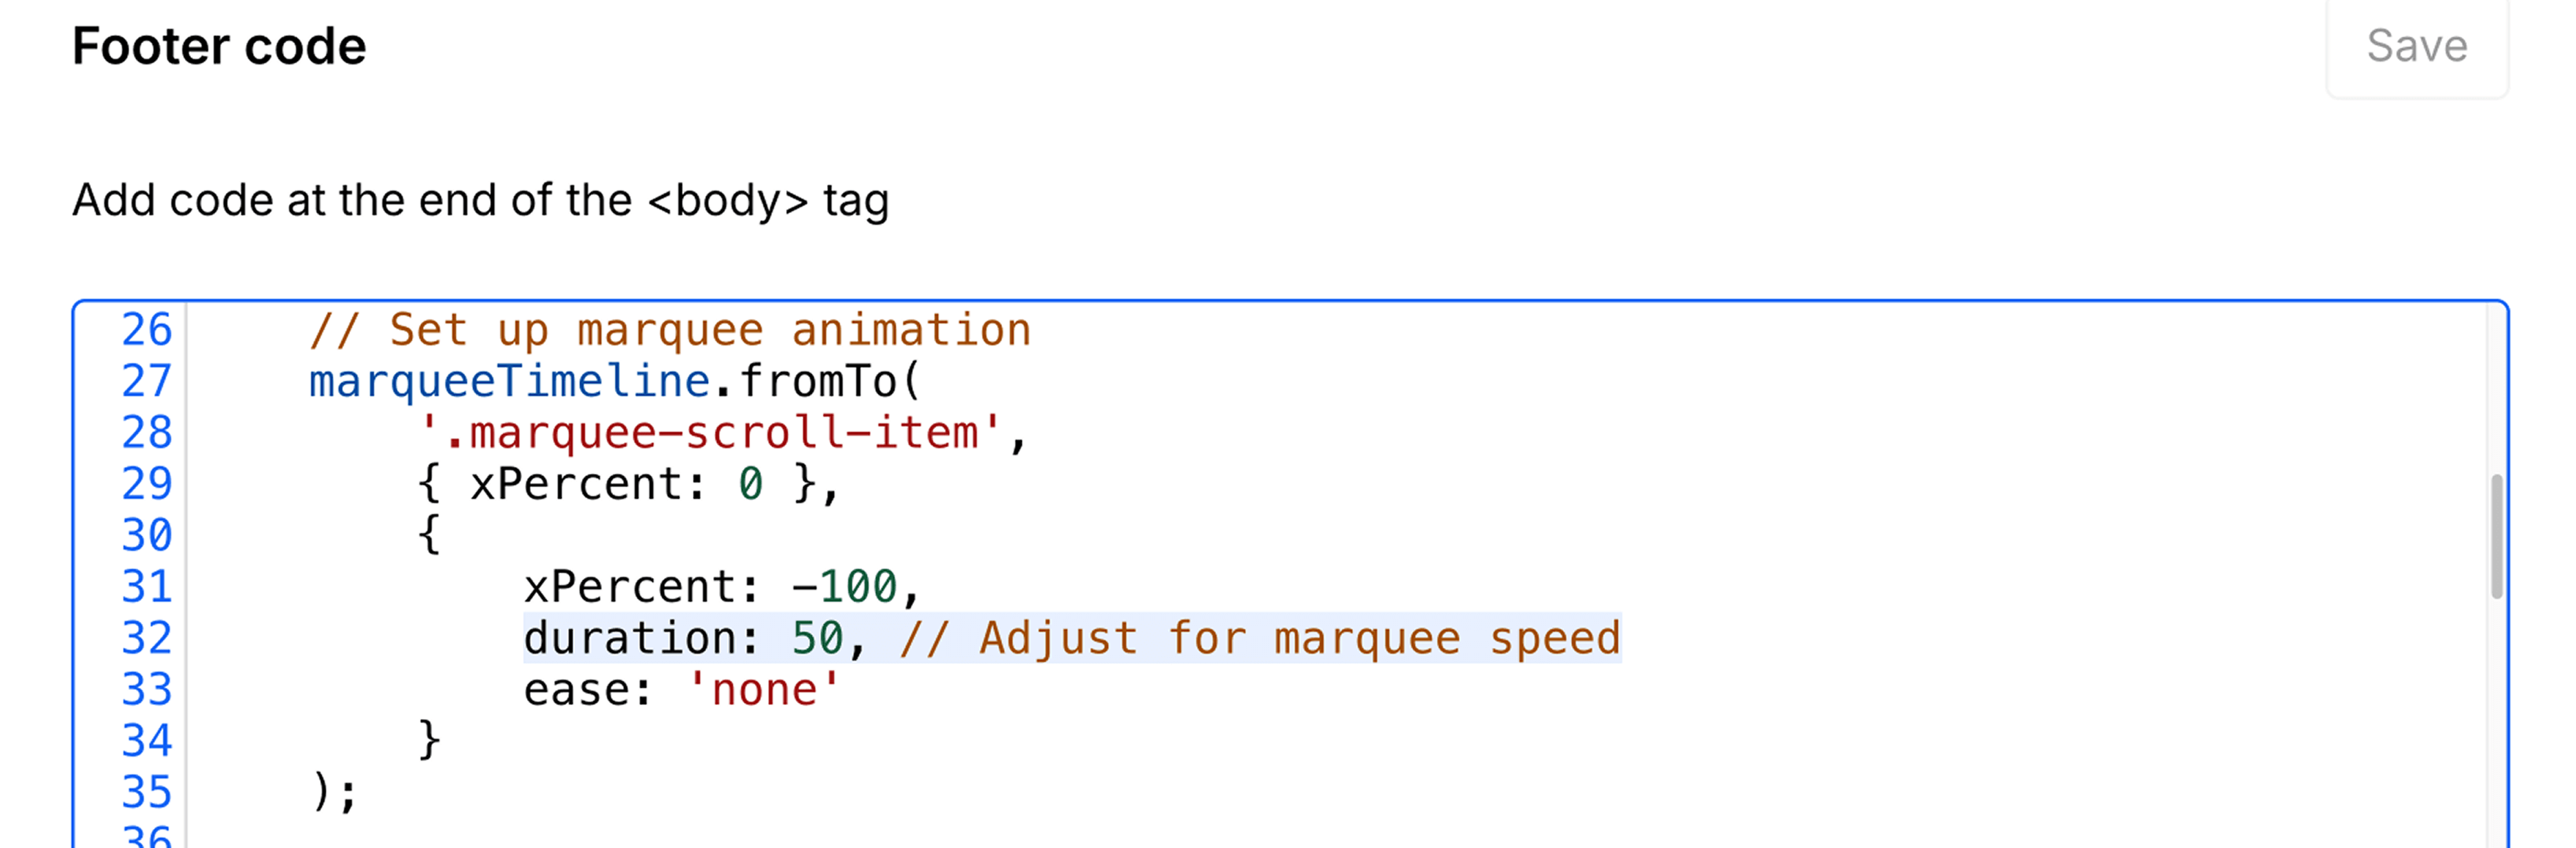
Adjusting Speed
If you want to change the marquee's speed, you'll need to modify the duration value in the custom code. The value is measured in seconds (eg. 50 gives it a duration of 50 seconds), and you need to look for this line:
Number Counter Animation
What It Does
The number counter animation makes numbers count up from 0 to a target value when they scroll into view. Perfect for statistics, achievements, or any numeric data.
How to Set It Up
Required Structure:
You need two things:
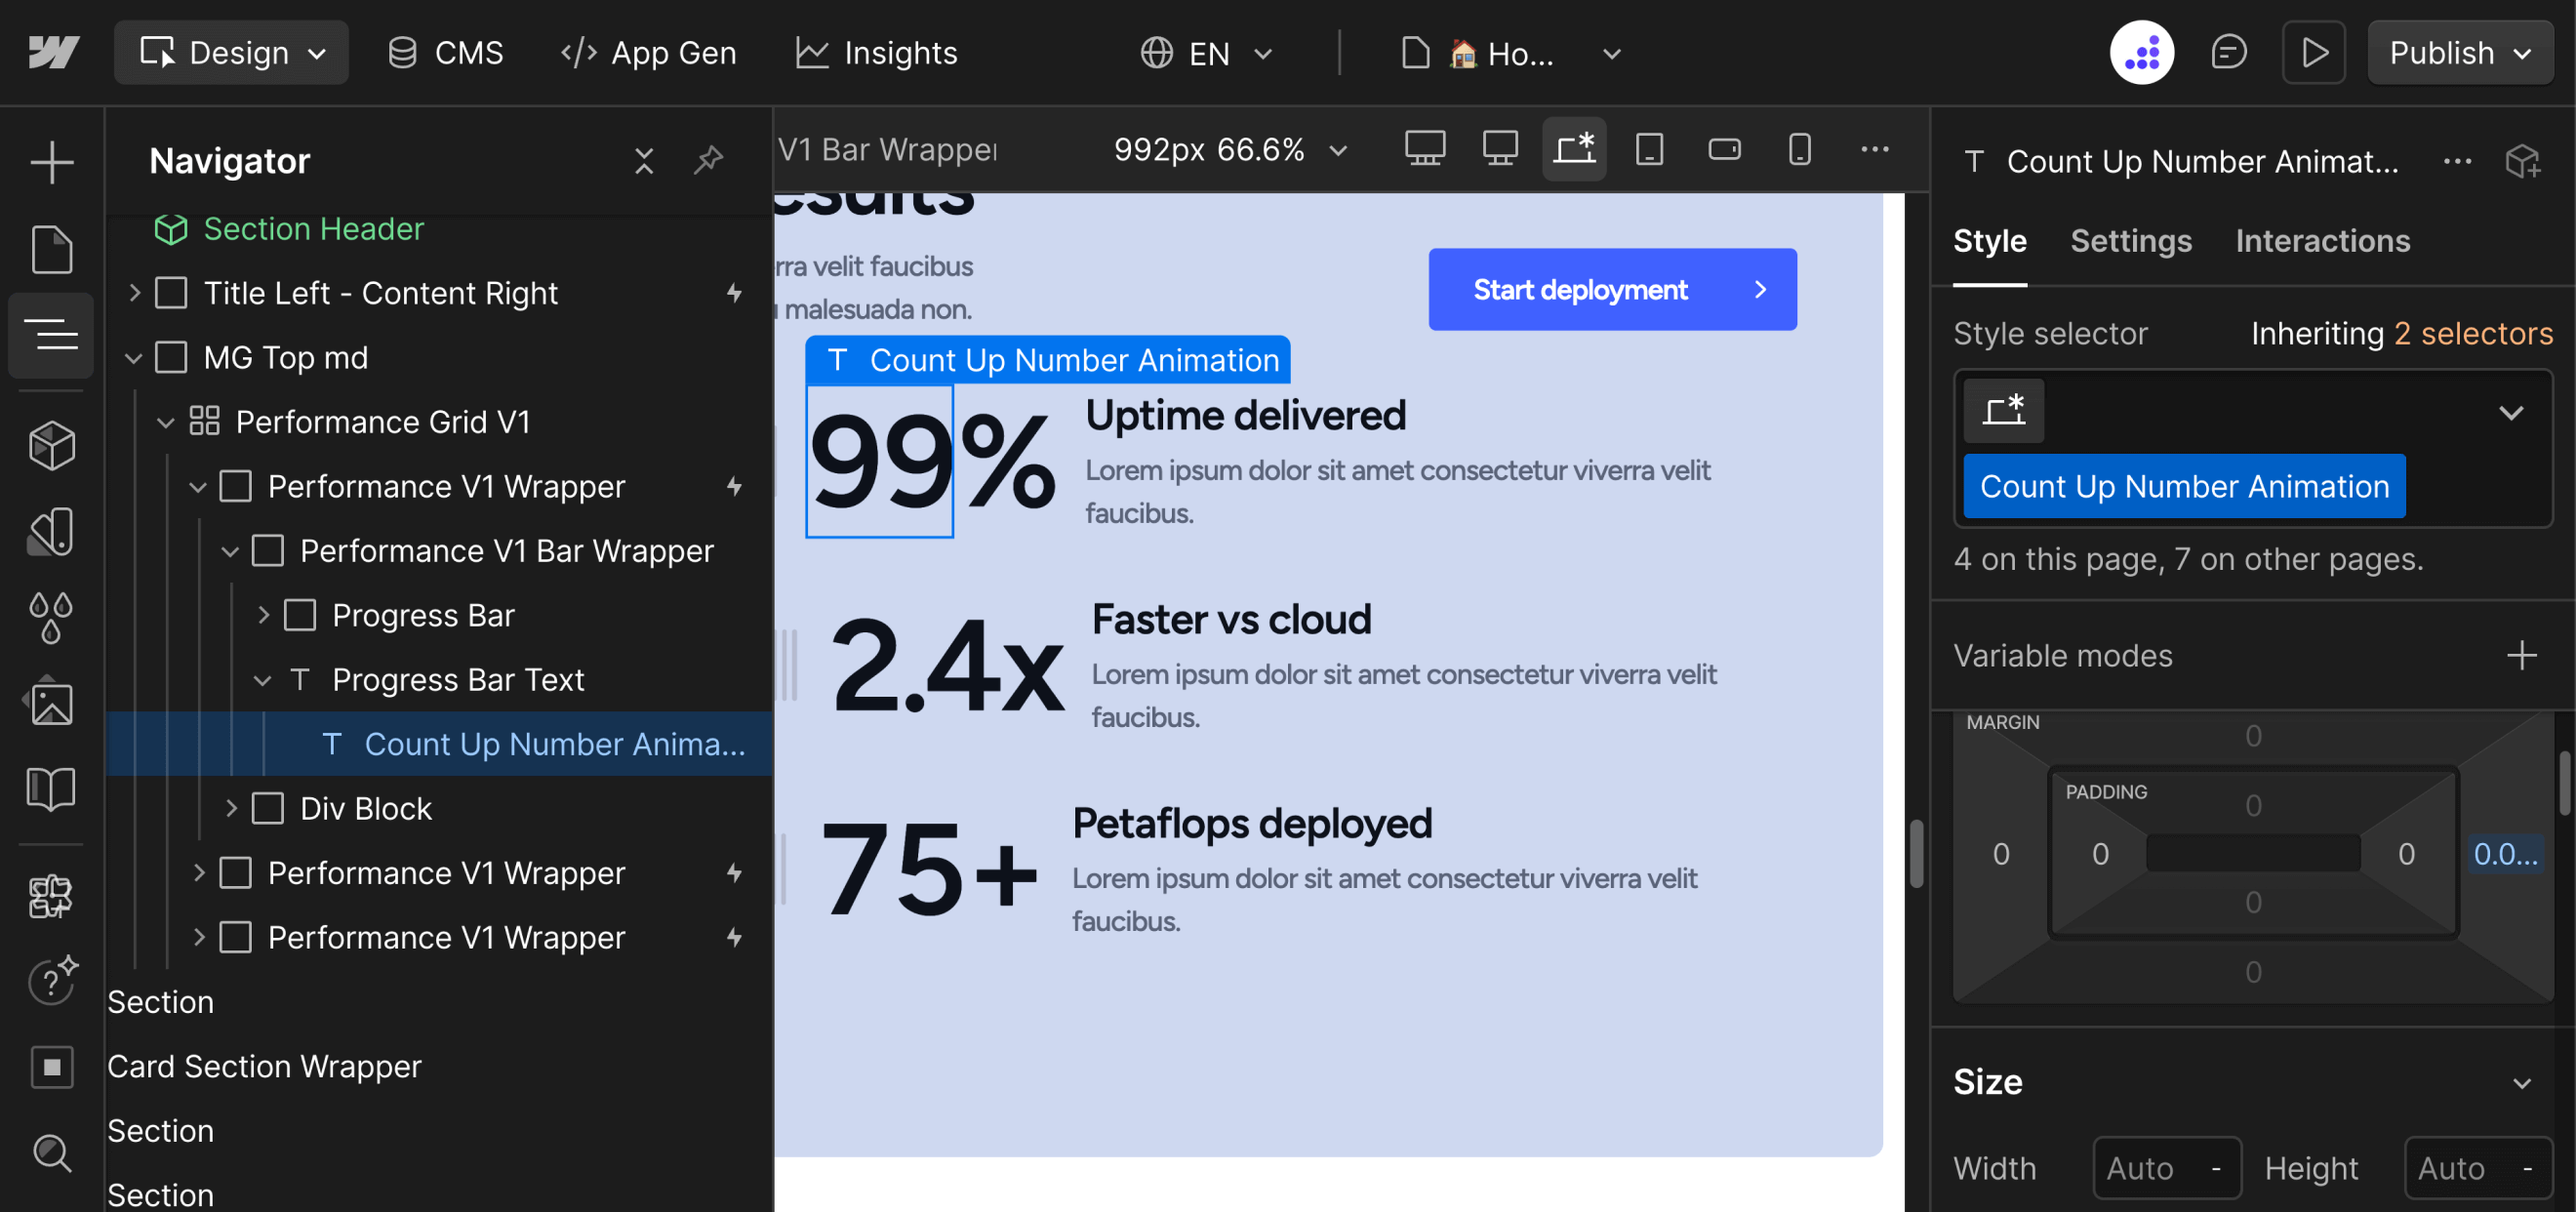
- A text element or span with the class Count Up Number Animation
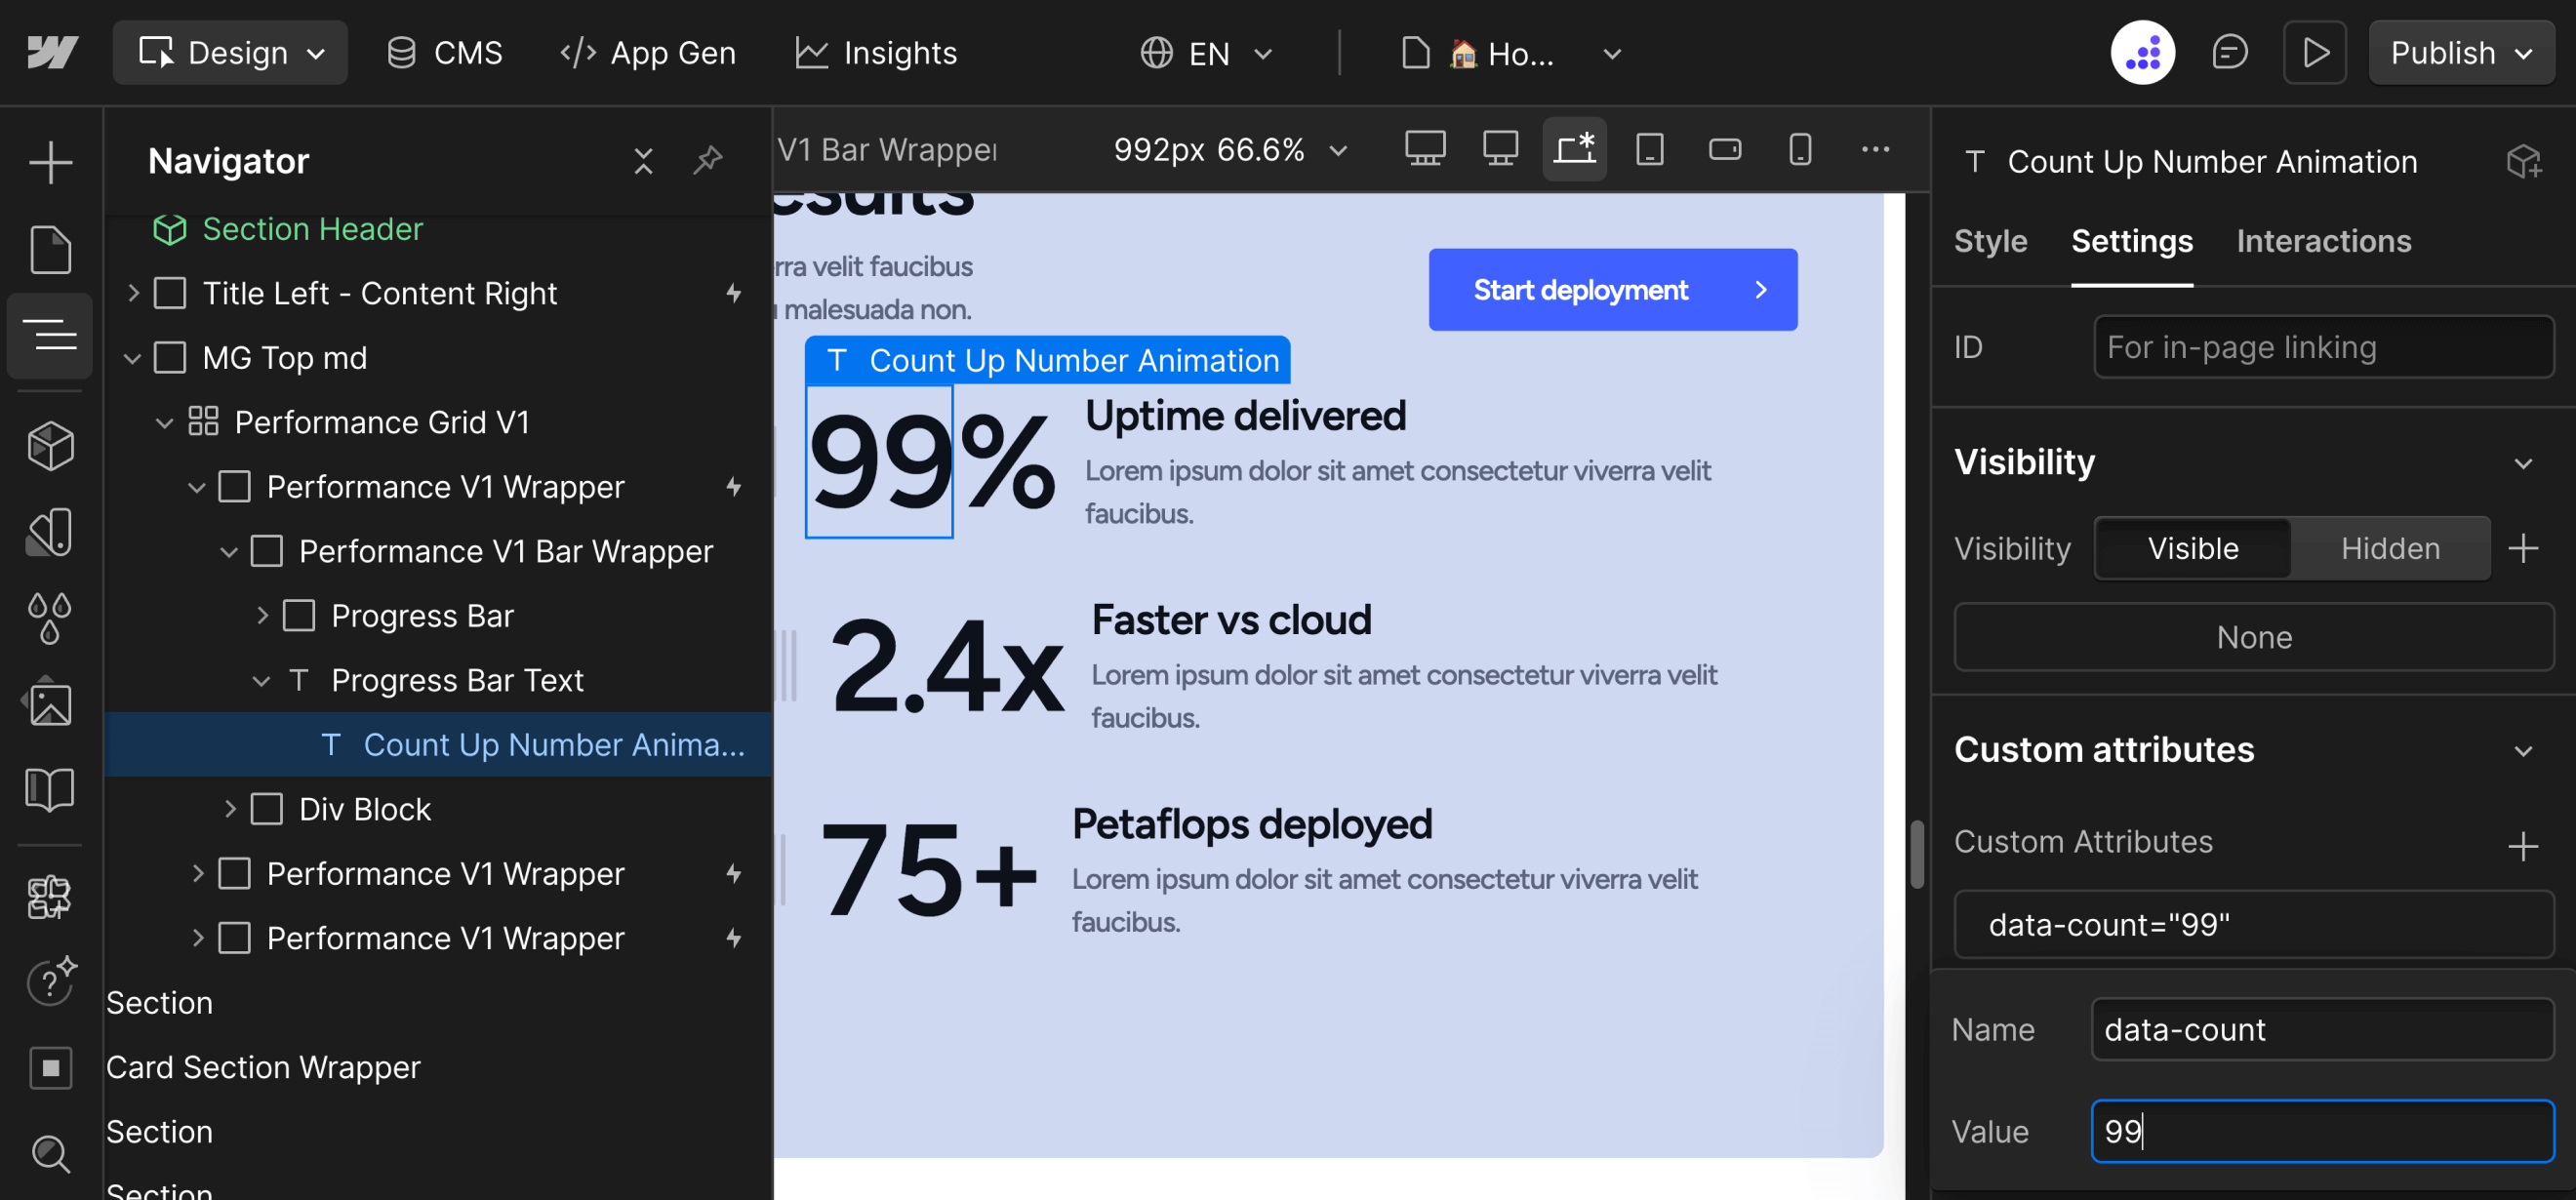
- A custom attribute on that same element: data-count with your target number
Step-by-Step Setup
- Select the text element that will display your number
- If you want only part of the text to animate (like "200+" where only "200" animates), wrap just the number portion in a Span
- Add the class Count Up Number Animation to the span (or text element)
- Click on the element's settings on the right sidebar and add a custom attribute:
- Name: data-count
- Value: your target number (e.g., 99)
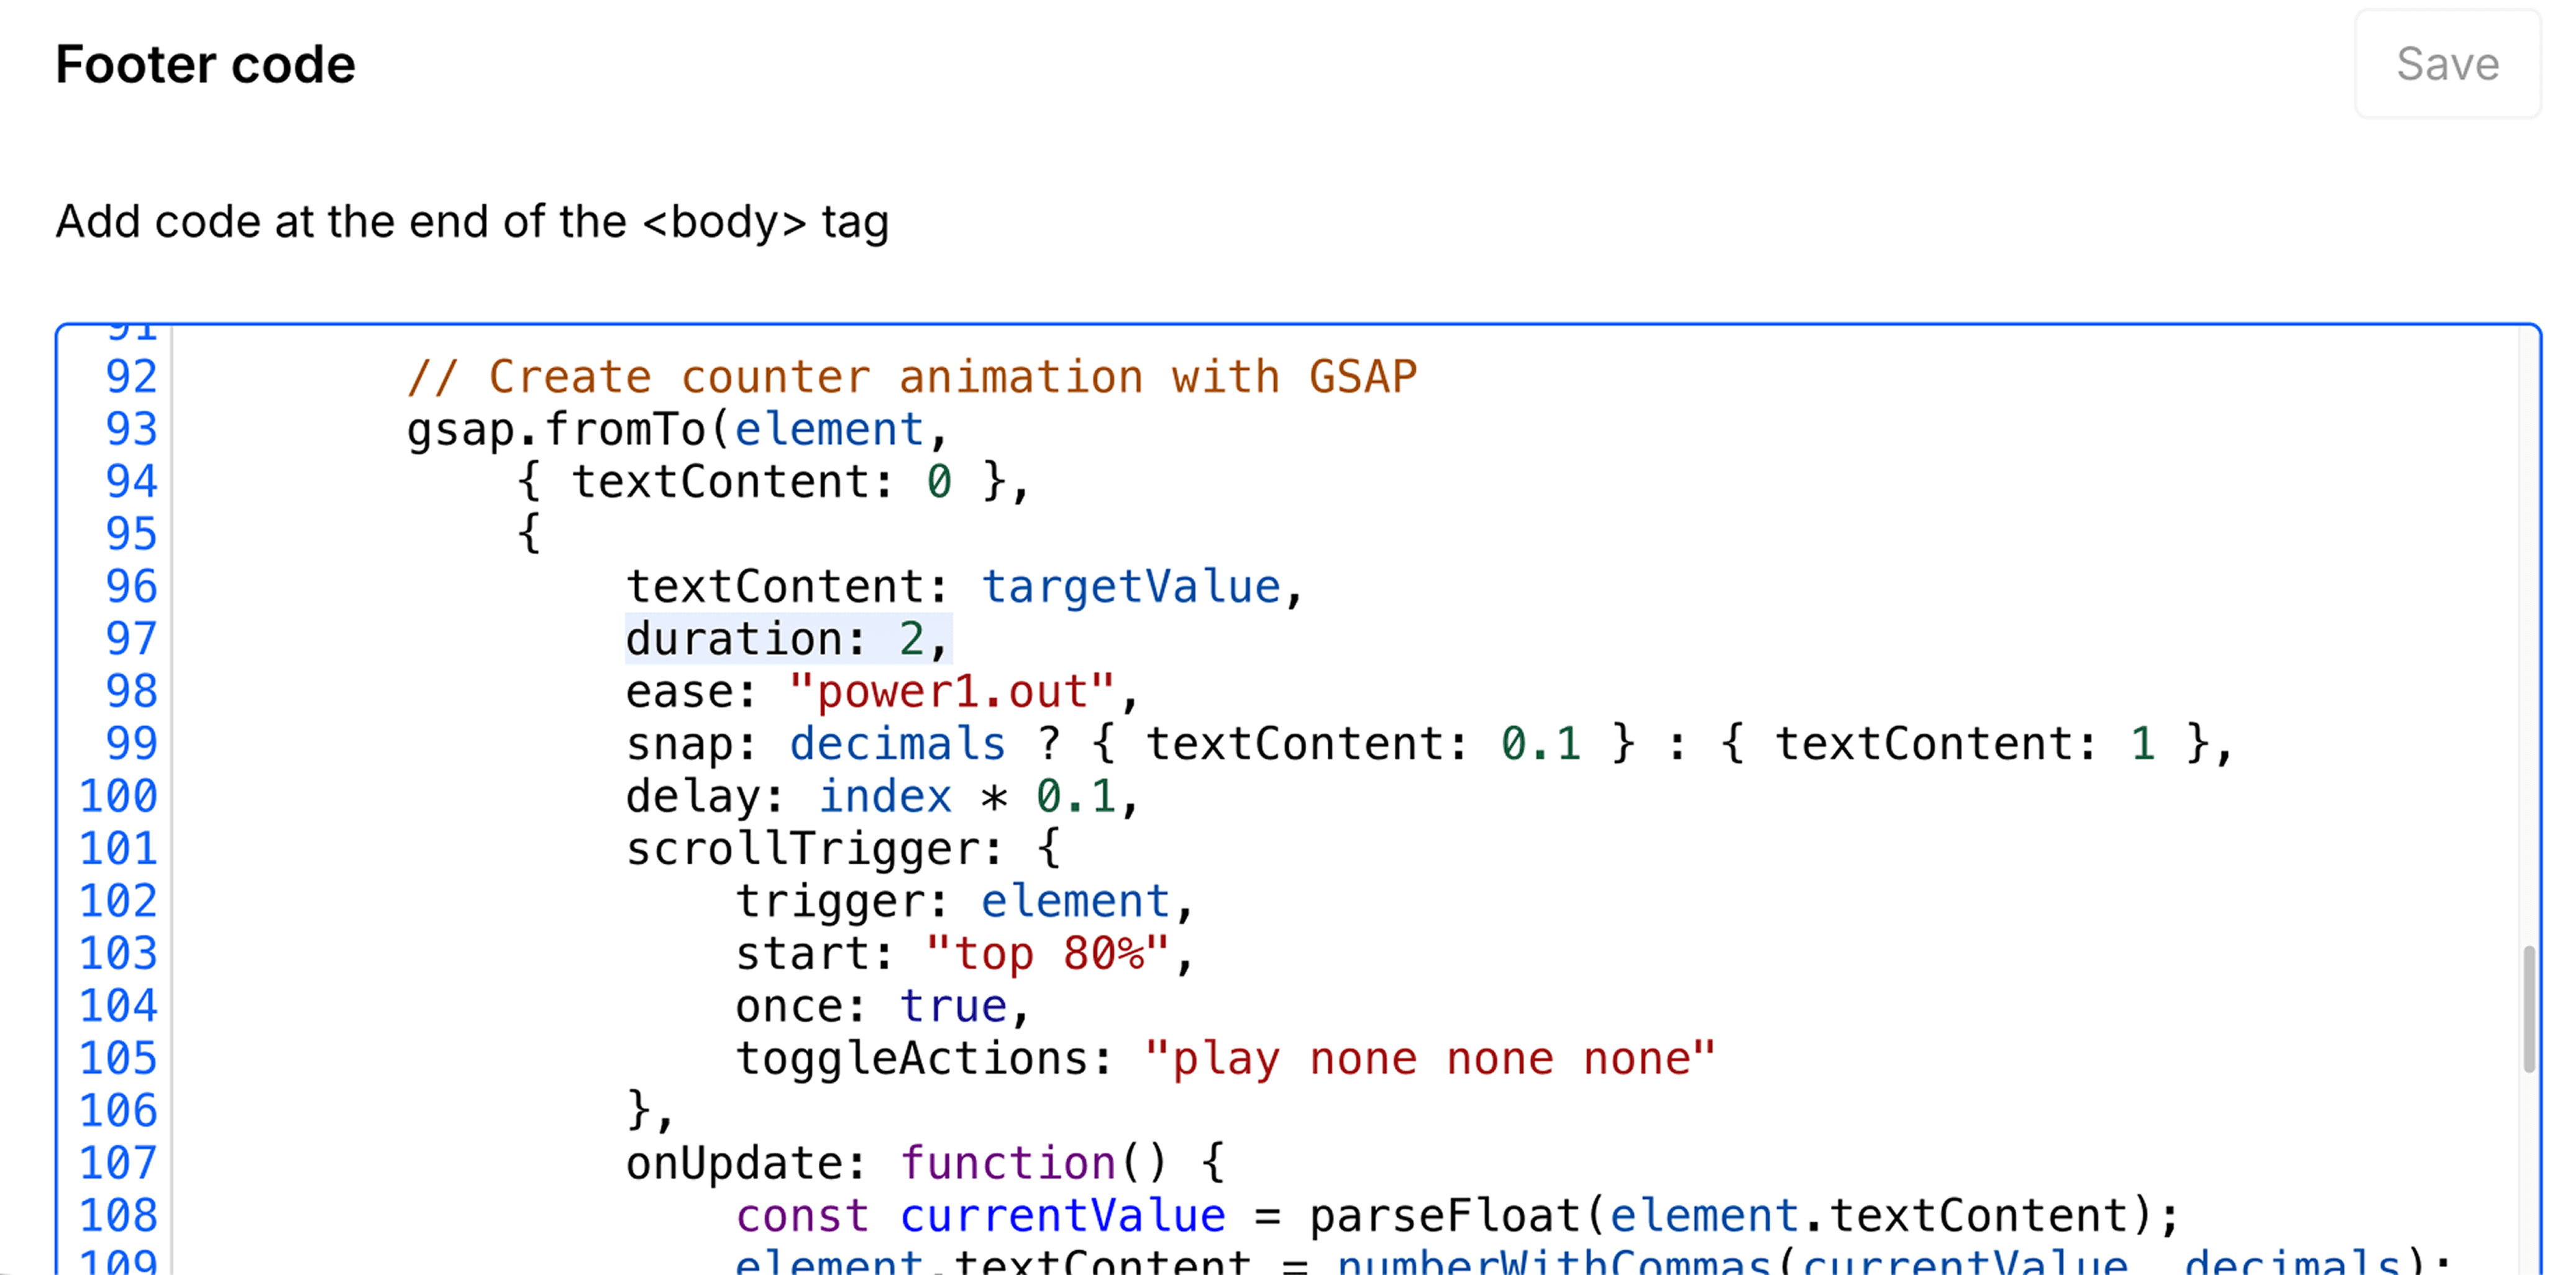
Adjusting Speed
If you want to change the counter's speed, you'll need to modify the duration value in the custom code. The value is measured in seconds (eg. 2 gives it a duration of 2 seconds), and you need to look for this line:
Number formatting
The counter automatically formats the values into thousands:
- data-count="5000" will be displayed as 5,000
- the data-count number shouldn't be separated by commas, the counter will do it automatically
Decimal Numbers
The counter automatically detects if your target number has decimals:
- data-count="5" will count whole numbers: 0, 1, 2, 3, 4, 5
- data-count="5.5" will count with one decimal: 0.0, 1.1, 2.2... 5.5
Multiple Counters
You can have multiple counters on the same page. Each counter:
- Animates independently when it enters the viewport
- Has a small staggered delay so they don't all start at once
- Only animates once (won't re-animate if you scroll back up)
Designer visualization
The number that you see in the designer will be overridden by the value set on the Custom Attribute, but you may still set the correct number on the designer for easier visualization.
Progress Bar Animation
What It Does
The progress bar animation creates an animation that starts from 0 and makes it grow until a set amount.
How to Set It Up
Required Structure:
You need three things:
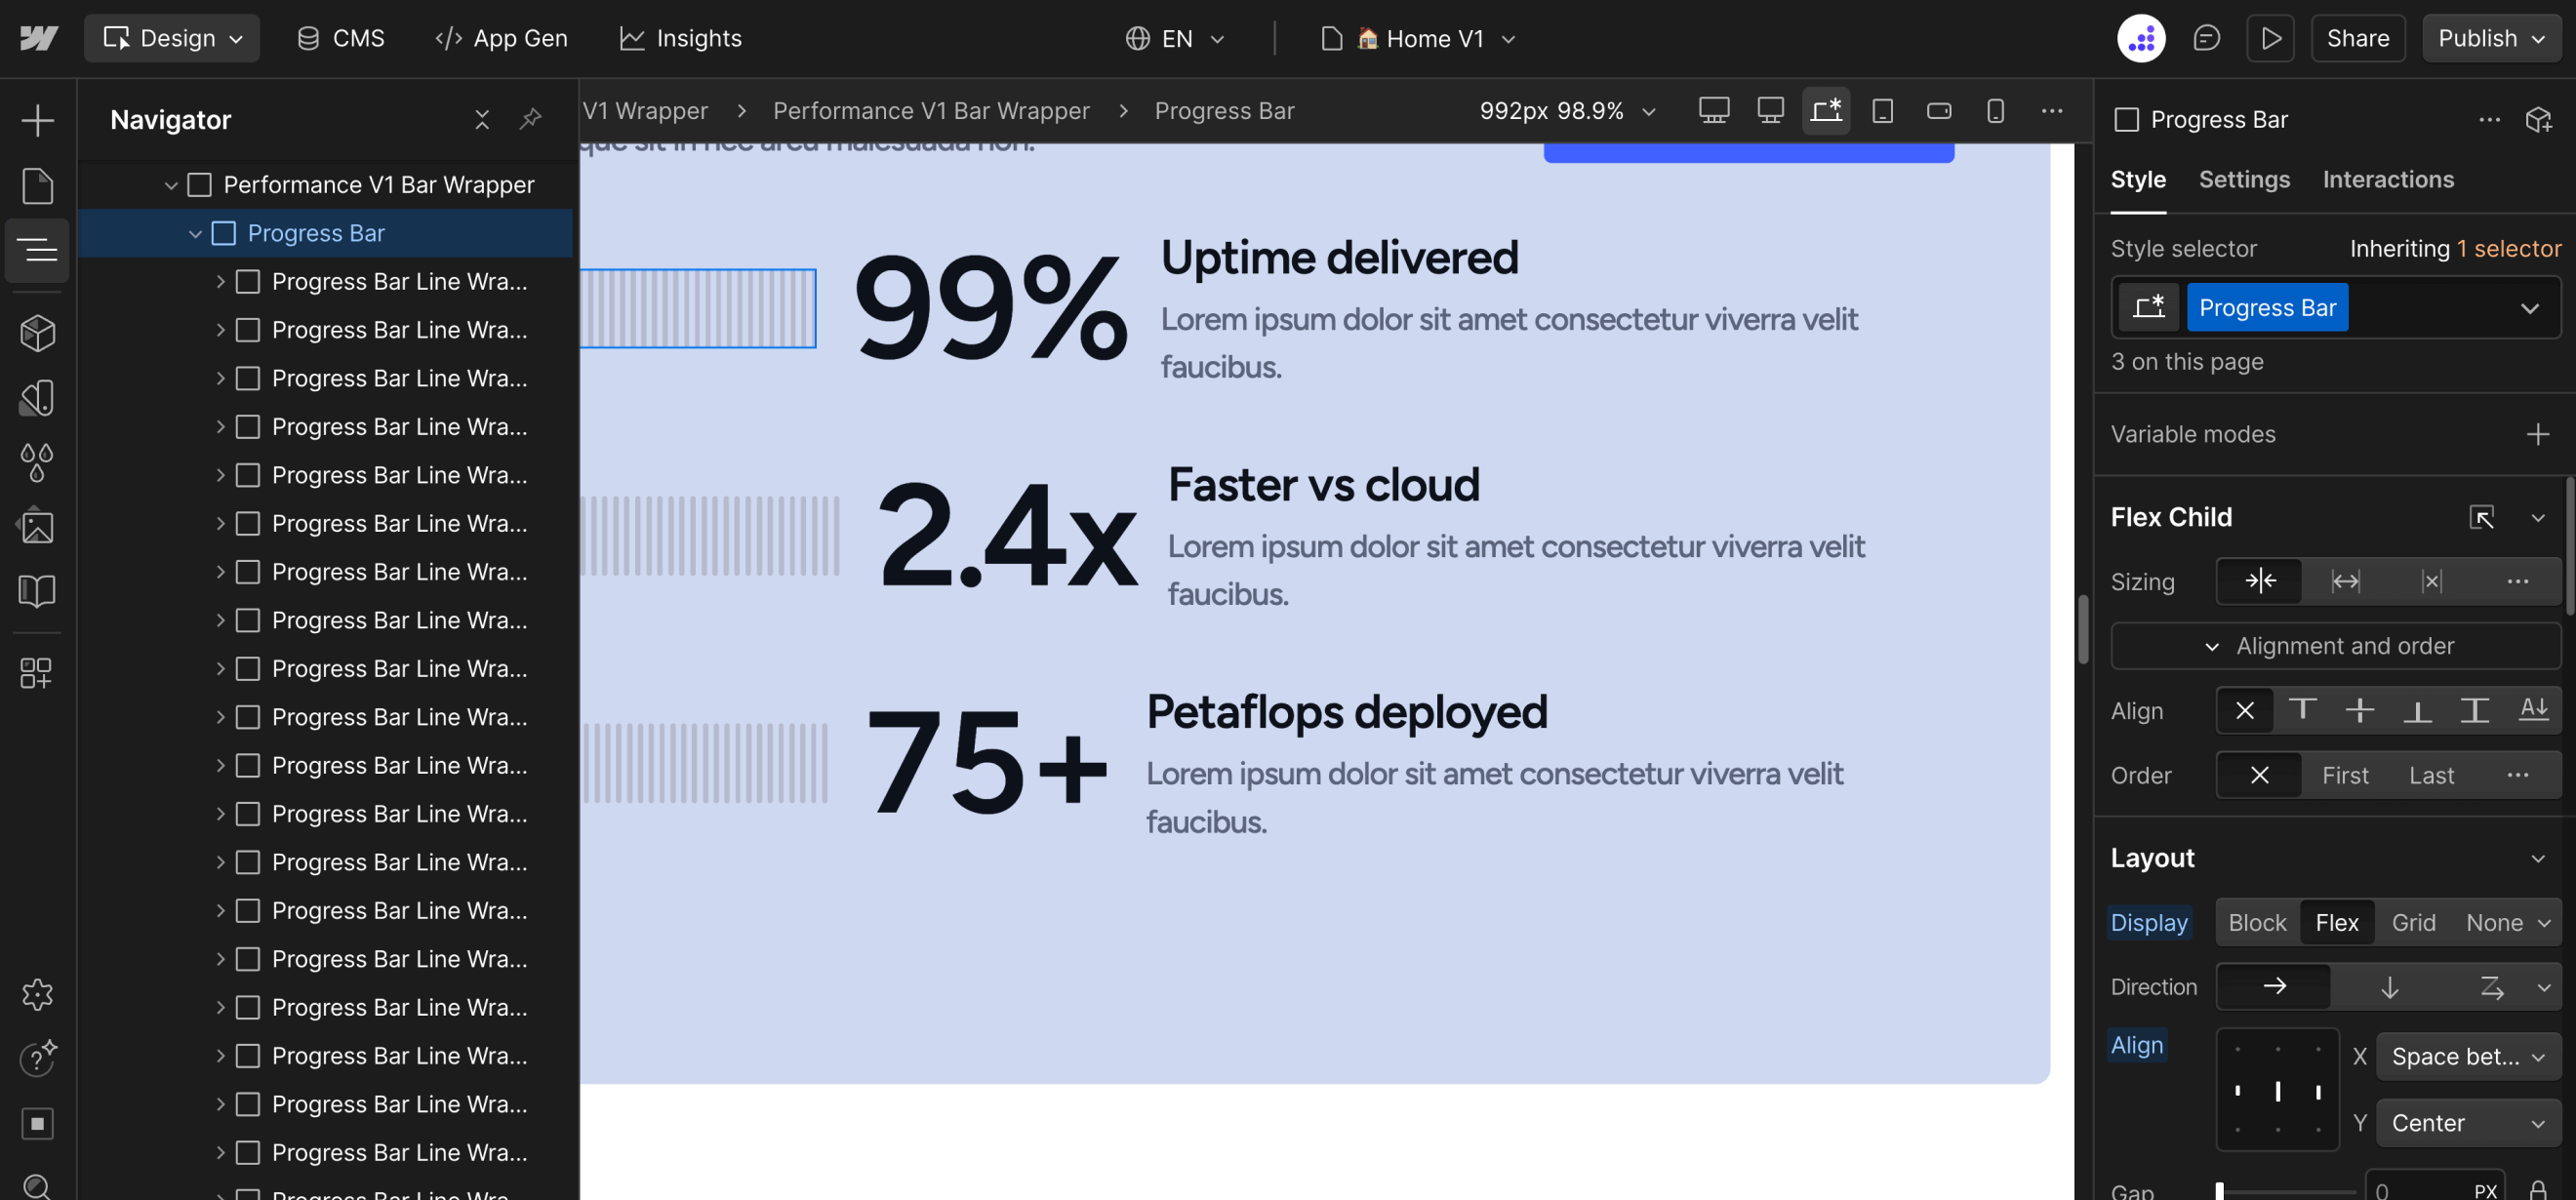
- A main container with the class Progress Bar
- Multiple containers inside with the class Progress Bar Line Wrapper
- A div block inside each Progress Bar Line Wrapper with the class Progress Bar Line
Step-by-Step Setup
- Select the container with the class Progress Bar
- Click on the element's settings on the right sidebar and add a custom attribute:
- Name: data-progress
- Value: your target number (e.g., 99)
Important note: Your target number represents the percentage of the active progress bar, for instance a value of 83 represents 83% of the full lenght. If you go over 100, the progress bar will grow to the end.

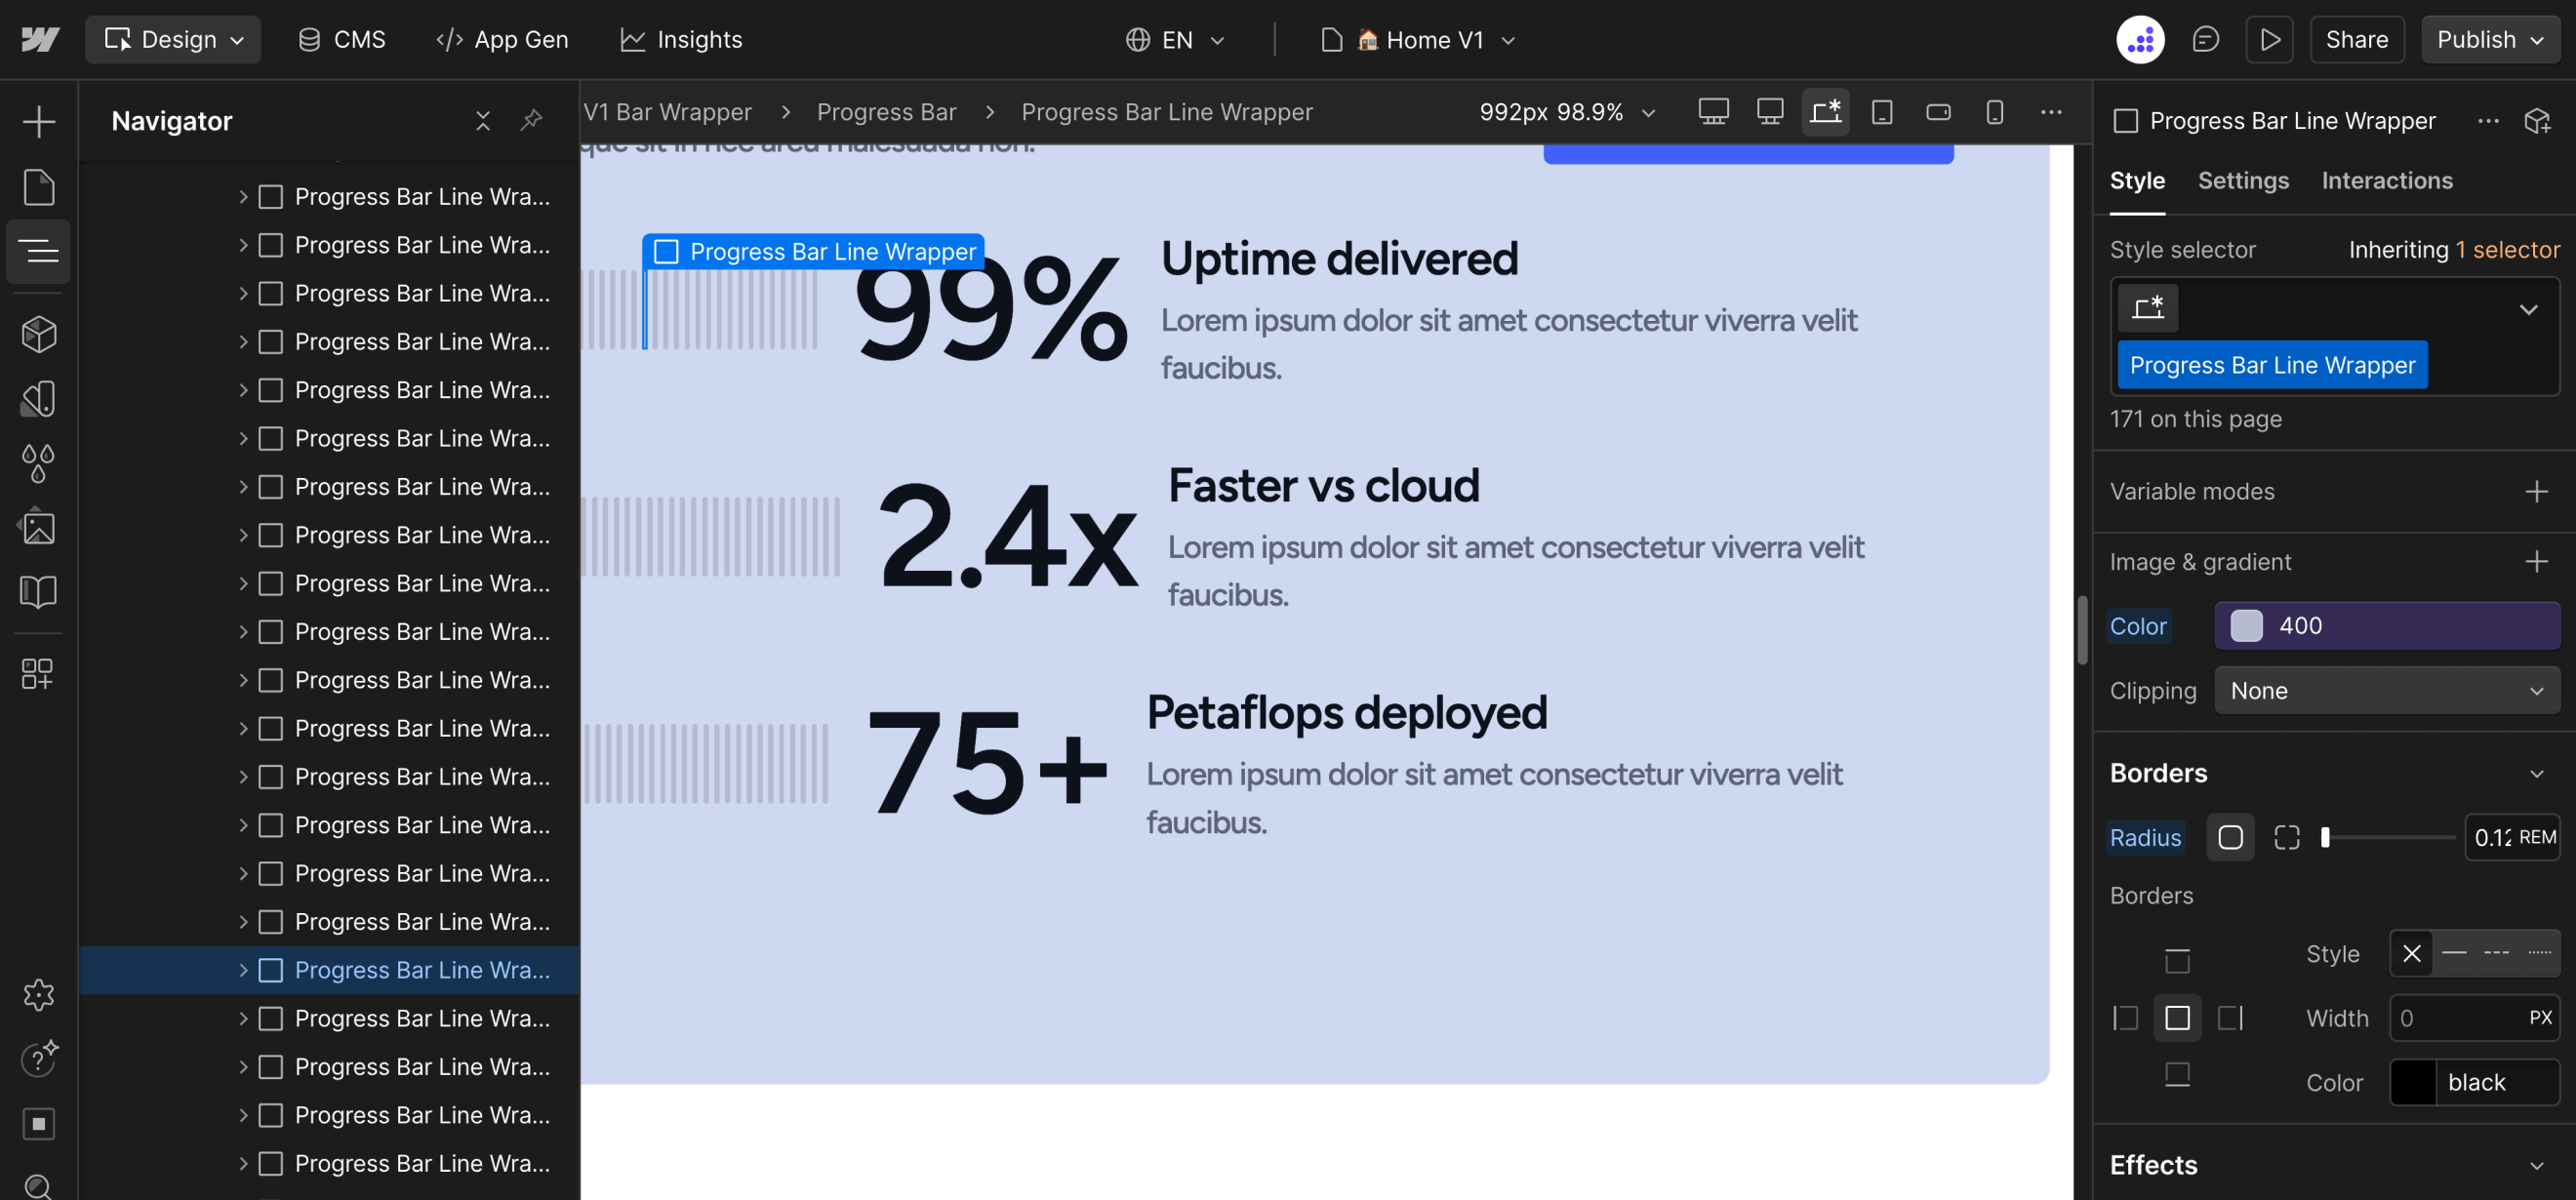
Inactive bar color
If you want to change the inactive's bar color, you have to select the item with the class Progress Bar Line Wrapper and change the background color
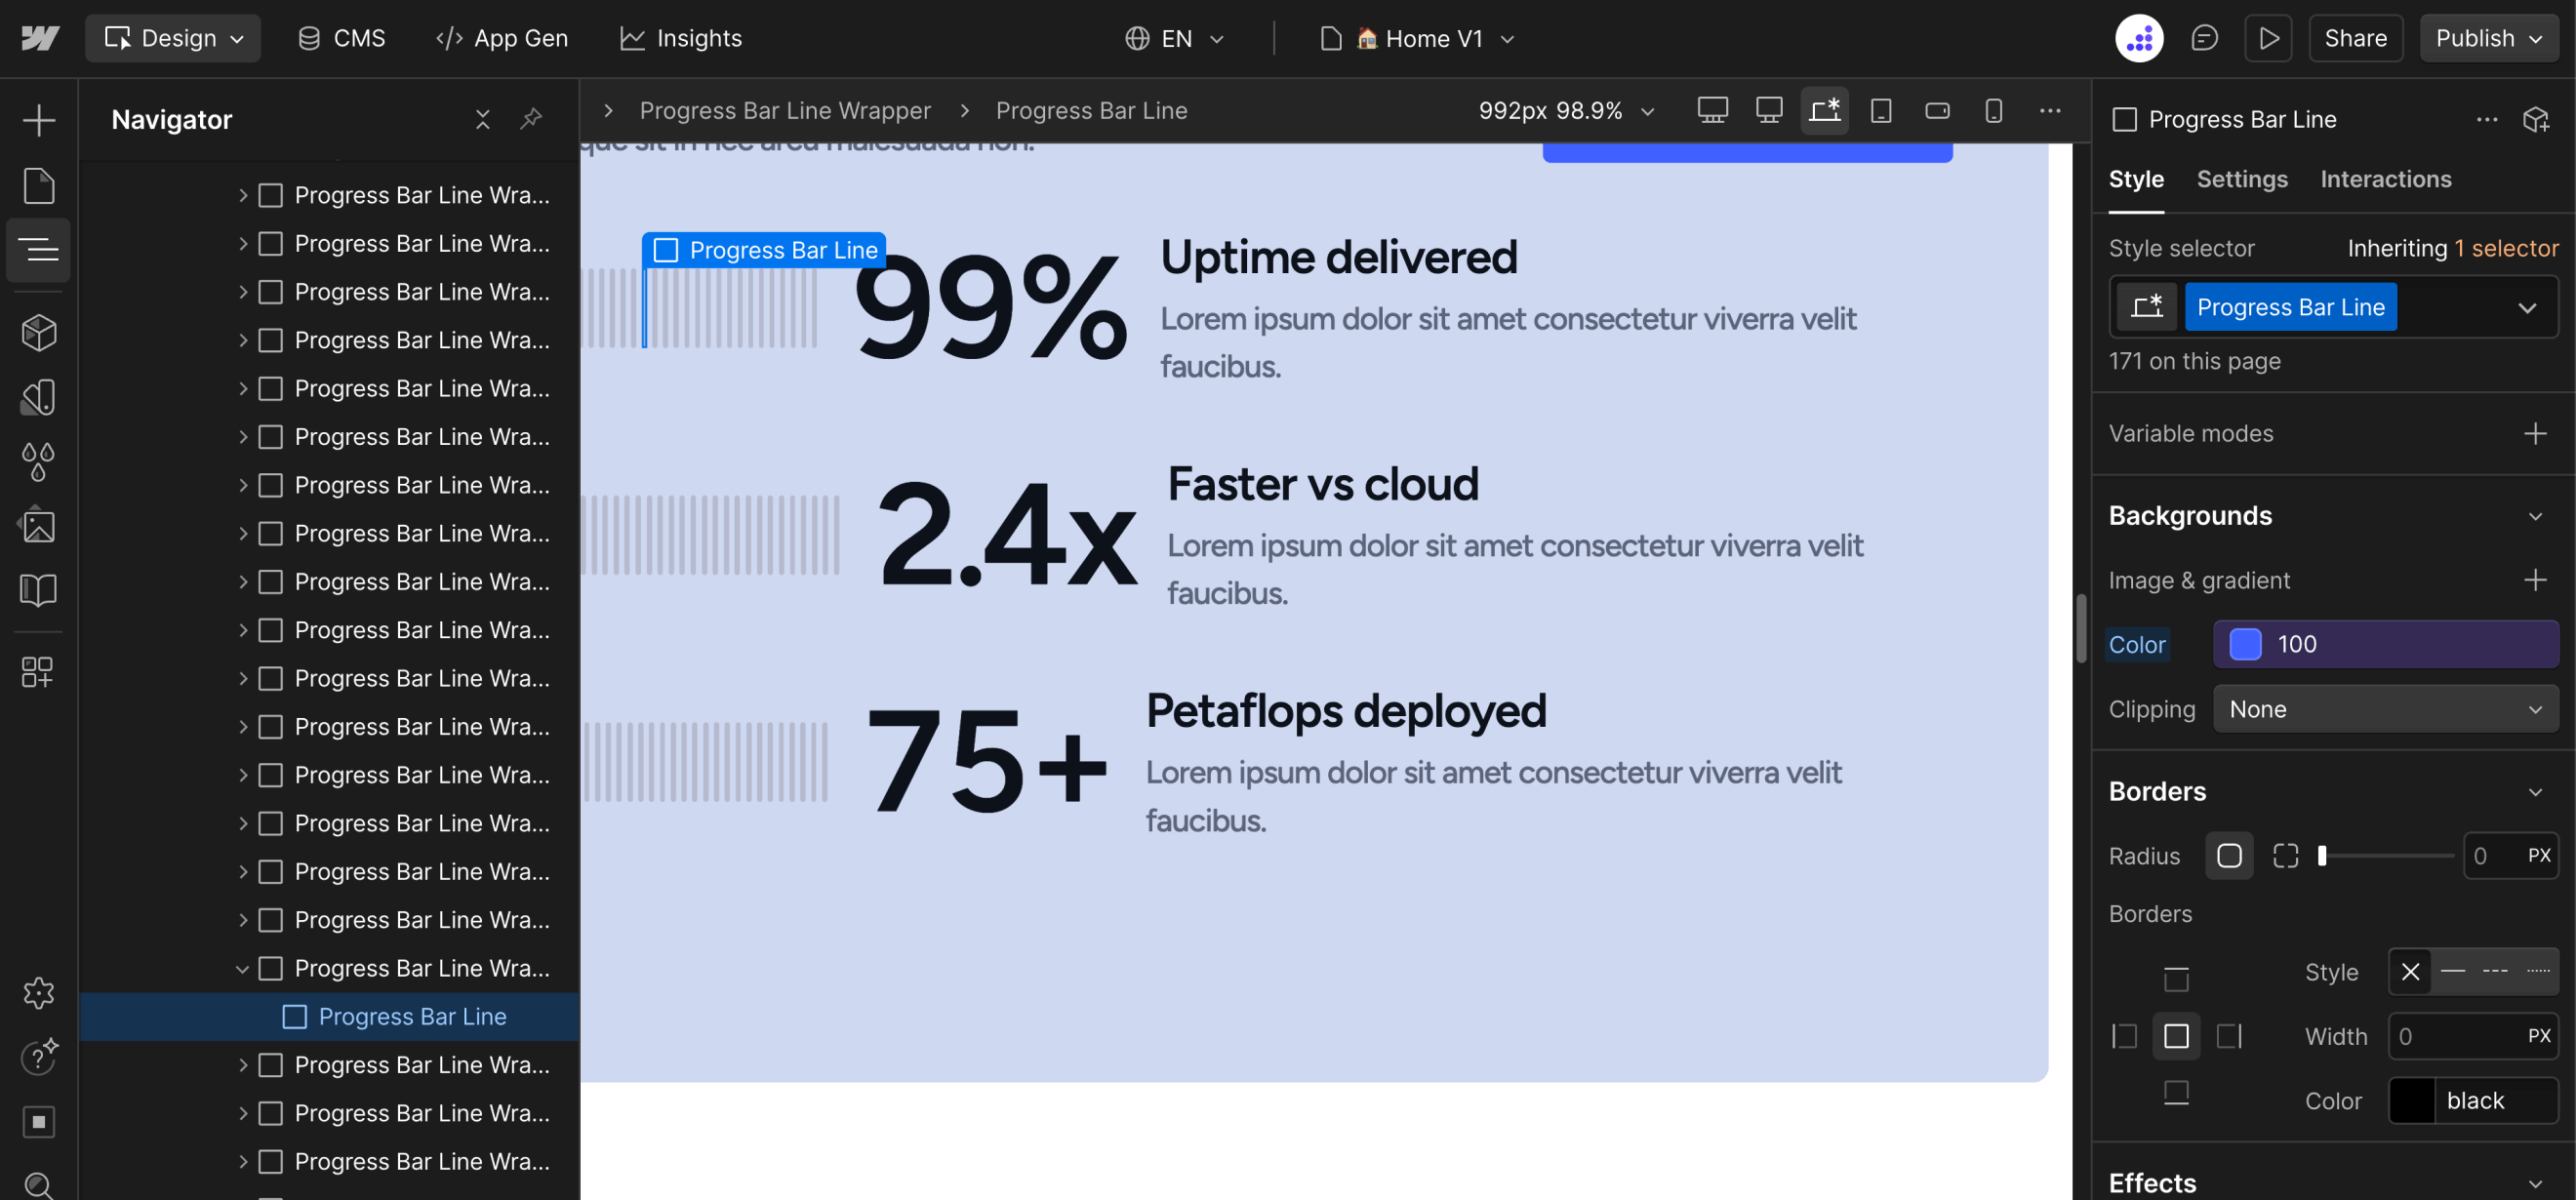
Active bar color
If you want to change the active's bar color, you have to select the item with the class Progress Bar Line and change the background color.
Important note: The item has an opacity of 0% which is why you won't see the color changing on Webflow's designer. You can briefly set it to 100% to preview the color, but you have to change it back to 0% when you're done, otherwise the animation won't work.
Pixel Image Reveal Animation
What It Does
The pixel image reveal animation creates an animation that pixelates an image cover and gradually reveals it when it enters into view.
How to Set It Up
Required Structure:
You need two things:
- A main container with the class Pixelated Image Wrapper
- An image inside
- A container alongside the image with the class Pixelated Frame
- A div block inside that container with the class Pixelated Square
Changing the cover's color
If you want to change the image cover's color, you have to select the item with the class Progress Bar Line Wrapper and change the background color
Troubleshooting
Marquee Animation Not Working
Problem: The logos aren't scrolling
- Check: Do all child elements have the class marquee-scroll-item?
- Check: Are ScrollTrigger and Observer plugins enabled in Settings > GSAP?
Problem: I see gaps or jumps in the animation
- Solution 1: Add more copies of your Marquee Scroll Item (aim for 4-5 identical copies)
- Solution 2: Make sure each element contains the exact same content in the same order
Problem: The animation is too fast or too slow
- Solution: Adjust the duration value in the custom code (line with
duration: 50)
Counter Animation Not Working
Problem: Numbers don't count up
- Check: Does your element have the class count-up-number-animation?
- Check: Did you add the custom attribute data-count with a number value?
- Check: Is the ScrollTrigger plugin enabled in Settings > GSAP?
Problem: Counter shows "0" or "NaN"
- Check: The data-count value should only contain numbers (and optionally one decimal point)
- Wrong: data-count="200+"
- Right: data-count="200" (add the "+" as regular text outside the counter element)
Problem: Multiple counters start at the same time
- This is expected behavior. The slight stagger is automatic but subtle.
Progress Bar Animation Not Working
Problem: The progress bar isn't growing
- Check: Do your elements have the corresponding classes?
- Check: Does the class Progress Bar Line have an opacity of 0%?
- Check: Do the classes Progress Bar Line Wrapper and Progress Bar Line have different background colors?
- Check: Is the ScrollTrigger plugin enabled in Settings > GSAP?
Pixel Image Reveal Animation not working
Problem: The image cover doesn't appear
- Check: Do your elements have the corresponding classes?
- Check: Is the element with the class Pixelated Square inside the element with the class Pixelated Frame?
- Check: Is the ScrollTrigger plugin enabled in Settings > GSAP?
Need support?
If you need help customizing these scripts or run into any issues not covered in this documentation, please email us at:
We're here to help you make the most of your Datacenter Webflow template!